 Axioo launched two variants of the first smartphone based on Android products, Axioo Vigo 410 and 350. The Vigo 410 use 8255 1GHz Snapdragon processor, powered with Android 2.3 Gingerbread, 512 MB of internal memory, 2 GB of internal storage media, and MicroSD expansion slot up to 32 GB. Vigo 410 also has a variety of connectivity features like GPRS, EDGE, HSDPA 14.4 Mbps to Wi-Fi 802.11 b/g/n and Bluetooth BT 2.1. Vigo 410 also equipped with 5MP 16:9 ratio autofocus wide camera, geo-tagging, face detection, also features GPS and of course with HTML browser that supporting Flash.
In the other hand, Vigo 350 is a 3G smartphone with dual sim card,. powered with 2.2 Froyo Android OS, also with 512 MB of internal storage and a MicroSD slot up to 32 GB. Data connectivity (EDGE, GPRS, up to HSDPA 7.2 Mbps), WLAN (Wi-Fi 802.11 b/g/n with Bluetooth BT 2.1. It also equipped with a 5MP autofocus camera with geo-tagging, face and smile detection, and touch focus.
The 410 model arrive on my desk this evening with a common request … yeah 🙂 … rooting the phone, and here is the How To :
Requirement and Preparation :
- Make sure you were running linux, if you were using winblows, close this page!
- Make sure you already had an Android Debugging Bridge (adb) on your system, if not, download the android SDK Tools from here and follow the instruction there for installation on your system.
- Download this root file I packed in gzip and extract them on some folder on yours.
- Read this thoroughly :
Your warranty is now void.
I am not responsible for bricked devices, dead SD cards, you experience flat tires, thermonuclear war, global warming, or you getting fired because the alarm app failed.
Please do some research if you have any concerns about risk of getting rooted before continuing! YOU are choosing to make these modifications, and if you point the finger at me for messing up your device, I will laugh at you!!
If you have any other objection, don’t bother to comment, just close this page!
Rooting Process :
Let’s asume you already extract the root.tar.gz on some folder, here I extract on the uniroot folder :
[root@jfklixs-domain]# cd /home/jfdesign/project/android/uniroot
[root@jfklixs-domain uniroot]# ls
busybox su Superuser.apk
Now copy the 3 files busybox, su, and Superuser.apk into the phone writable folder /data/local/tmp :
[root@jfklixs-domain uniroot]# adb push busybox /data/local/tmp
3064 KB/s (1062992 bytes in 0.338s)
[root@jfklixs-domain uniroot]# adb push su /data/local/tmp
527 KB/s (26332 bytes in 0.048s)
[root@jfklixs-domain uniroot]# adb push Superuser.apk /data/local/tmp
2598 KB/s (196521 bytes in 0.073s)
[root@jfklixs-domain uniroot]#
And then we need to give execute permission to the file :
[root@jfklixs-domain uniroot]# adb shell
$ chmod 6755 /data/local/tmp/su
$ chmod 755 /data/local/tmp/busybox
$ chmod 644 /data/local/tmp/Superuser.apk
$ exit
[root@jfklixs-domain uniroot]#
The needed file for root purposes already copied and executable on the phone temporary folder. Now we need to move that 3 files into the correct folder on the phone, but we cannot do that because we have no privilege to write into the phone system folder. The only way we can do this is using the Download Mode on the phone. As you may already know, Android and Linux is pretty much on the same heritage, makes it possible for us to get root access over the Android phone if you are running with root privileges within Linux. I’m using klixs here but you can use any linux distro out there as long as you had a root access.
Continue with this steps :
- Turn off the phone
- Hold Volume Up Button and then press Power Button
- The phone will enter Download Mode
- Plug it in the usb cable into the phone and a running linux / KLIXs system. (The media detection will popup some notification about the phone storage folder is being connected, leave it untouched)
- Go to KMenu -> File Tools -> Konqueror Super user mode
- It will ask for a root password, enter it.
- You can see the folder on the left side panel of Konqueror, go into userdata -> local -> tmp
- You may see the 3 files we copy before inside them : busybox, su and Superuser.apk
- You may use the konqueror split window feature so it can show the folder in two pane mode, thus you can copy easily.

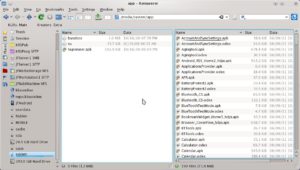
- Copy the busybox and su file into /system/bin folder
- Copy the Superuser.apk file into /system/app folder
- Do NOT unplugged the usb cable from the phone, and do NOT turn off the phone manually !!!
- Open the back case of the phone and pullout the battery for a second and then put back in
- Now turn on the phone normally, you already ROOTED !
You can verify by checking again with adb :
- Plug in again the usb cable on the phone
- open konsole, su to root and type : adb shell
- It will enter the phone shell and with user permission, type su to enter root
- On the phone, the Superuser utility will pop up asking you about to Allow root access, touch Allow button of course
- Now you will have a # prompt on the konsole
Have fun and good luck.


