 Hits another rooting request for this Axioo Picopad7 tablet this morn. You may see the specs here. As long as I know, this device doesn’t need a specific bootloader oem unlock or anything special like that. Just some ordinary copy ing the root binary and application tools.
As usual, before we begin, we must prepare some tools and agreement :
Requirement and Preparation :
- Make sure you were running linux, if you were using winblows, close this page!
- Make sure you already had an Android Debugging Bridge (adb) on your system, if not, download the android SDK Tools from here and follow the instruction there for installation on your system.
- Read this thoroughly :
Your warranty is now void.
I am not responsible if you brick your phone, get stuck in a bootloop, or if your phone grows arms and tries to kill you. Flash at your own risk!
Please do some research if you have any concerns about risk of getting rooted before continuing! YOU are choosing to make these modifications, and if you point the finger at me for messing up your device, I will laugh at you!!
If you have any other objection, don’t bother to comment, just close this page!
Rooting Process :
There are some files we need to download and prepare :
- Download the Superuser tools and binary from androidsu.com or you may get it here.
- Extract them to some folder
- Enable the USB Debugging features from the picopad7 settings menu, under Developer options menu
- Connect the picopad7 usb cable to your system
Continue with this steps :
1. Open konsole / terminal of your linux distro and cd into your extracted su folder.
{code}(jfdesign@jfklixs-ubuntu:~)$ cd project/android/uniroot/
(jfdesign@jfklixs-ubuntu:uniroot)$ ls
busybox su Superuser.apk{/code}
2. Now push each of them to the device.
{code}
(jfdesign@jfklixs-ubuntu:uniroot)$ adb push busybox /data/local/tmp
4501 KB/s (1062992 bytes in 0.230s)
(jfdesign@jfklixs-ubuntu:uniroot)$ adb push su /data/local/tmp
428 KB/s (26332 bytes in 0.060s)
(jfdesign@jfklixs-ubuntu:uniroot)$ adb push Superuser.apk /data/local/tmp
3423 KB/s (196521 bytes in 0.056s)
(jfdesign@jfklixs-ubuntu:uniroot)${/code}
3. Now it’s time to log in to device shell with adb and readjust the superuser tool to correct location and permission.
{code}(jfdesign@jfklixs-ubuntu:~)$ adb shell
root@android:/ # cd /data/local/tmp
root@android:/data/local/tmp # cat su > /system/bin/su
root@android:/data/local/tmp # chmod 6755 /system/bin/su
root@android:/data/local/tmp # cat busybox > /system/bin/busybox
root@android:/data/local/tmp # chmod 755 /system/bin/busybox
root@android:/data/local/tmp # cat Superuser.apk > /system/app/Superuser.apk
root@android:/data/local/tmp # chmod 644 /system/app/Superuser.apk
root@android:/data/local/tmp #{/code}
4. Done. You’re rooted. Easy isn’t it ?
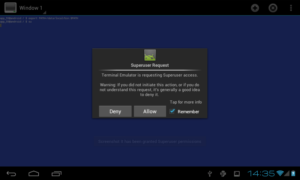
Try to install Root Explorer, Screenshot it, or any other apps that will need root access permission to test this rooted device. I’m using simple terminal application here and su to root, it will pop up the Superuser permission like this :
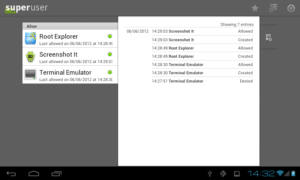
Each apps that needs superuser permission will granted the root access with this Superuser apps and you may allow or deny easily.
Have fun.
This tutorial also can be use to root the 9.7″ tablet Picopad GIM without problem.


