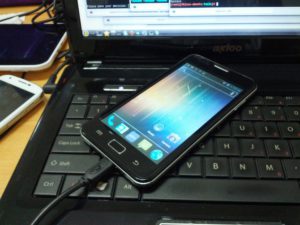
Axioo releasing this dual sim card smartphone GSM and WCDMA around this September with a codename Pico GEA. You may find the product spec on the axioo site or around the internet easily. This device using MTK6575 ArmV7 1GHz processor with 5 inch display and 800×480 resolution screen, using android ICS 4.0.3 as stock OS equiped with a total 4Gb internal storage as described here on df output :
{code}shell@android:/ $ df
Filesystem Size Used Free Blksize
/dev 237M 52K 237M 4096
/mnt/asec 237M 0K 237M 4096
/mnt/obb 237M 0K 237M 4096
/system 503M 342M 161M 4096
/data 502M 123M 379M 4096
/cache 503M 8M 495M 4096
/mnt/sdcard 1G 99M 1G 4096
/mnt/secure/asec: Permission denied
1|shell@android:/ ${/code}
As always, try to find the rooting script on the internet and cannot find specifically for linux, then I found some chinese site that share the winblows bat file for the MTx65xx series that will do the same purpose on other brand, convert them to bash and share here just in case some user that doesn’t use winblows like me, can take advantage of it. Follow this below steps thoroughly and your Pico GEA will be rooted easily.
As usual, before we begin, we must prepare some tools and agreement :
Requirement and Preparation :
- Make sure you were running linux, if you were using winblows, close this page!
- Make sure you already had an Android Debugging Bridge (adb) on your system, if not, download the android SDK Tools from here and follow the instruction there for installation on your system.
- Read this thoroughly :
Your warranty is now void.
I am not responsible if you brick your phone, get stuck in a bootloop, or if your phone grows arms and tries to kill you. Flash at your own risk!
Please do some research if you have any concerns about risk of getting rooted before continuing! YOU are choosing to make these modifications, and if you point the finger at me for messing up your device, I will laugh at you!!
If you have any other objection, don’t bother to comment, just close this page!
Rooting Process :
There are some files we need to download and prepare :
- Download the root script and the supported binary code from here. (I already included the su, busybox and Superuser.apk so you don’t have to find elsewhere). Extract them to a folder such as PicoGEAroot or somethin else. You may use tar -xzf picogearoot.tar.gz or using gui tools such as Ark, Archiver or any other archiver you like.
- Enable the USB Debugging features from the pico GEA settings menu, under Developer options menu
- Connect the pico GEA usb cable to your linux system
Continue with this steps :
1. Open konsole / terminal of your linux distro and cd into your extracted PicoGEAroot files above
{code}[root@jfklixs-ubuntu:MT6575]# cd PicoGEAroot/
[root@jfklixs-ubuntu:PicoGEAroot]# ls
busybox root-picoGEA.sh su Superuser.apk
[root@jfklixs-ubuntu:PicoGEAroot]#{/code}
2. Now run my script :
{code}[root@jfklixs-ubuntu:PicoGEAroot]# ./root-picoGEA.sh{/code}
Your Pico GEA device will shut off rebooting, and your konsole terminal will show this :
{code}[root@jfklixs-ubuntu:PicoGEAroot]# ./root-picoGEA.sh
Rebooting (1/3) – Press Enter after the device completely rebooted{/code}
Just in case your device cannot rebooted automatically using the script command and just stuck in off position, NO worrying !! Do the manual rebooting below :
Rebooting manually :
- Unplugged the usb cable
- Open the back case of the device (better not closing temporarily during this rooting)
- Pull out the battery, and push back in seconds later
- Power on the device by pushing the power button until you feel the vibrator vibrate.
- Plug in the usb cable
- continue steps …
After waiting the device to boot and reach the logon screen … hit Enter and continue …
This reboot step will repeated 3 times, as the script will try to to pushing the root script into the device so it will grant guid 0 or known as root access granted.
Everytime you stuck on the power off postion during rebooting progress, just do manual reboot like above.
If everything is good, you will see this message in the konsole :
{code}[root@jfklixs-ubuntu:PicoGEAroot]# ./root-picoGEA.sh
Rebooting (1/3) – Press Enter after the device completely rebooted
Rebooting (2/3) – Press Enter after the device completely rebooted
uid=0(root) gid=0(root)
if id 0 / root, press Enter to begin rooting, or press ctrl+c to cancel
remount succeeded
363 KB/s (22364 bytes in 0.060s)
2908 KB/s (2005736 bytes in 0.673s)
3204 KB/s (432931 bytes in 0.131s)
Removing changes except ROOT
Rebooting (3/3) – Done, your Pico GEA device is rooted.
[root@jfklixs-ubuntu:PicoGEAroot]#{/code}
3. Done. You’re rooted. Easy isn’t it ? 😀
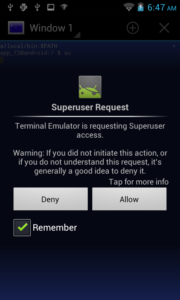
Try to install Root Explorer, Screenshot it, or any other apps that will need root access permission to test this rooted device. I’m using simple terminal application here and su to root, it will pop up the Superuser permission like this :
Each apps that needs superuser permission will granted the root access with this Superuser apps and you may allow or deny easily.
Have fun.


